
Enabling ESXi Shell Access
Enabling ESXi Shell Access is one of the task that i was recently working on while using vSphere console.
There are two ways in enabling ESXi Shell,
1. Using vSphere web client or vSphere client
2. Using direct console of the ESXi host
1. Using vSphere web client or vSphere client
1.1 Select the host, Click on Configuration tab
1.2 Click Security Profile
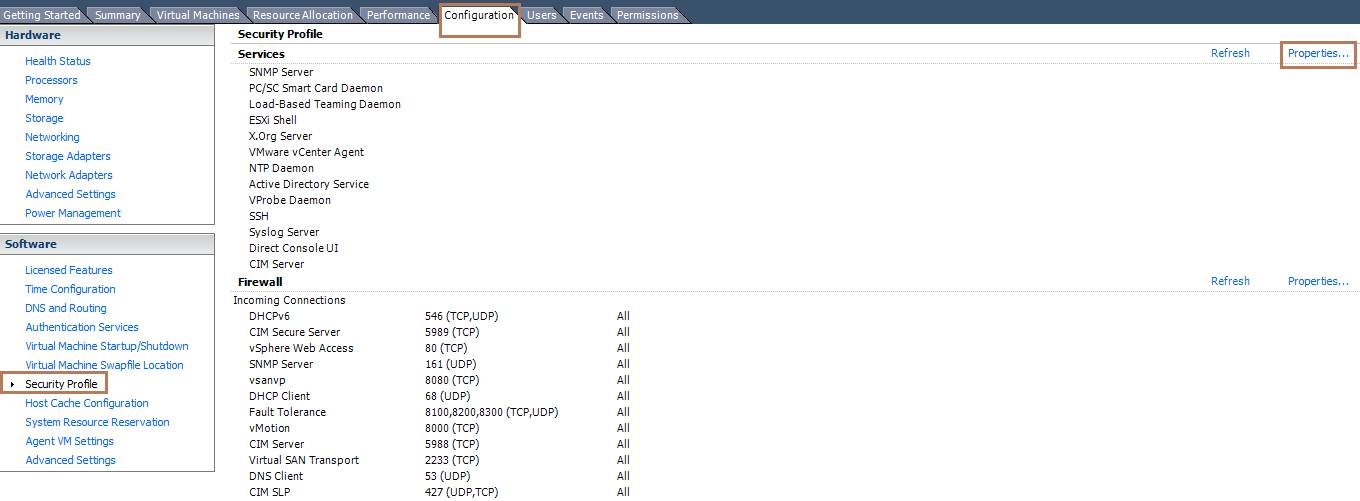
1.3 In the Services section, click Properties (visible at right hand side of the above image)
1.4 Select ESXi Shell.

1.5 Click on Options, To temporarily start or stop the service, click the Start or Stop button.
1.6 To change the Startup policy across reboots, select Start and stop with host and reboot the host.
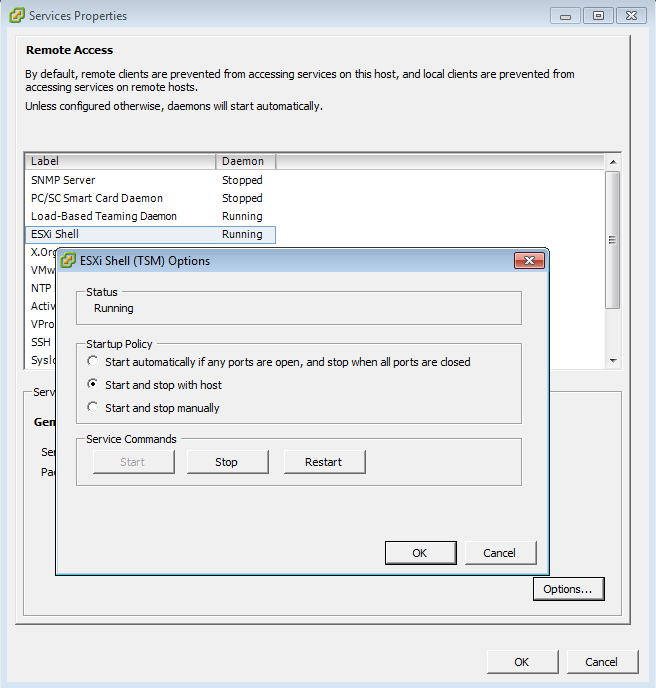
Click OK.
2. Using direct console of the ESXi host
2.1 At the direct console of the ESXi host, press F2 and provide credentials when prompted.
2.2 Scroll to Troubleshooting Options and press Enter.

2.3 Choose Enable ESXi Shell and press Enter.

2.4 On the left, Enable ESXi Shell changes to Disable ESXi Shell. On the right, ESXi Shell is Disabled changes to ESXi Shell is Enabled.

2.5 Press Esc until you return to the main direct console screen.
Refer to vSphere Documentation for reference.