
Oracle Document Capture Installation Process
Oracle Document Capture Installation Process
Oracle Document Capture (ODC) Installation Process is mentioned as below,
Prerequisites for ODC Installation,
You must be logged in to Windows with Administrator privileges to install ODC
The Windows Server should have JRE Version 1.6 or higher
A database user called PROD_ODC should exist in the IPM Database
An Oracle client 10g/11g 32 Bit Client with networking components should be installed on the windows machine
ODC Installation
Oracle Document Capture – Version 10gR3 (10.3.1.5.1)
1. Open the ODC installation folder and run the setup.exe
2. In the customer information screen, enter the user name and organization
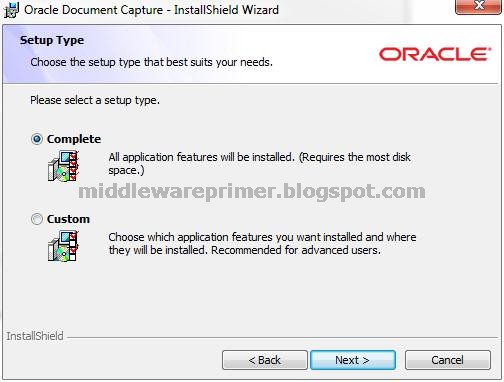
3. Select ‘Complete’ in the setup type screen
4. Click Install in Ready to Install the Application Screen
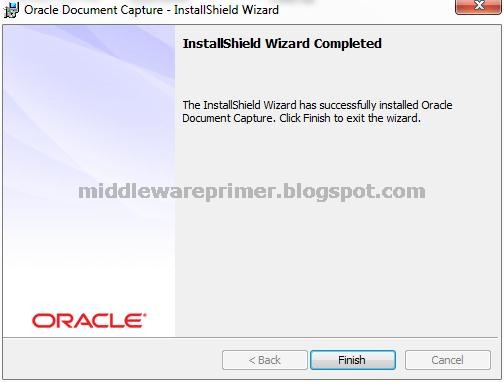
5. Click Finish when the installation completes

ODC Patch Installation
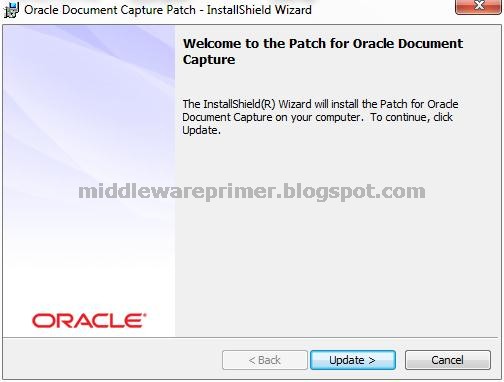
Install Patch p11813845_OFR_101350_Patch1
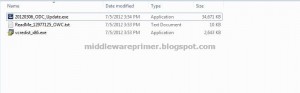
1. Open the ODC Patch installation folder (p12977125_ODC_101351_Patch3) and run the 20120306_ODC_Update.exe
2. Click Finish when the installation completes
Install patch p12977125_ODC_101351_Patch3
1. Double click the (vcredist_x86.exe) it will install automatically.
Post-Installation Steps
1.1 ODC Folders and database setup
1. Go to the Oracle Database client installation path where the TNSNAMES.ORA file is located:
C:\Oracle\product\…\client_1\Network\Admin\TNSNAMES.ORA and supply the TNS entry for the Imaging RAC database
SID =
(DESCRIPTION =
(ADDRESS = (PROTOCOL = TCP)(Host = hostname)(Port = 1562))
(CONNECT_DATA =
(INSTANCE_NAME = SID)
(SERVICE_NAME = SID)
)
)
2. Click on the Oracle Document Captureicon on the desktop. The configuration screen pops-up.
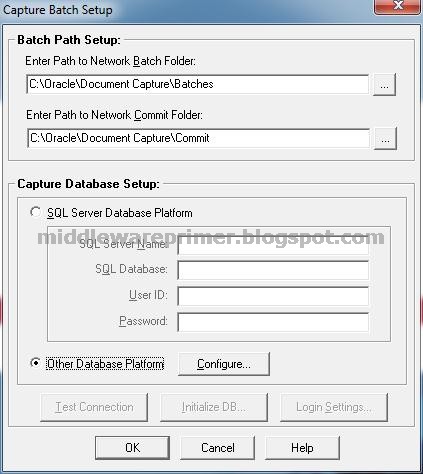
3. Click on the configure button to configure database and select connection provider “Oracle Provider for OLE DB”

4. Specify the schema user created for ODC and the password. Select Allow saving password and Test the connection. Click ok to save the configurations.

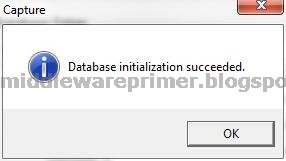
5. Click the Initialize DB button to create the tables in PROD_ODC schema. A message shows up to confirm the database cleanup. Click Yes to proceed

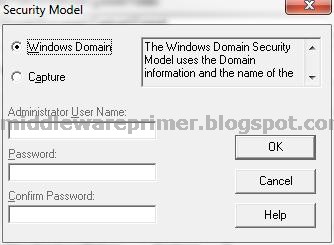
6. In the Security Model Screen, select Windows Domain as Security Model
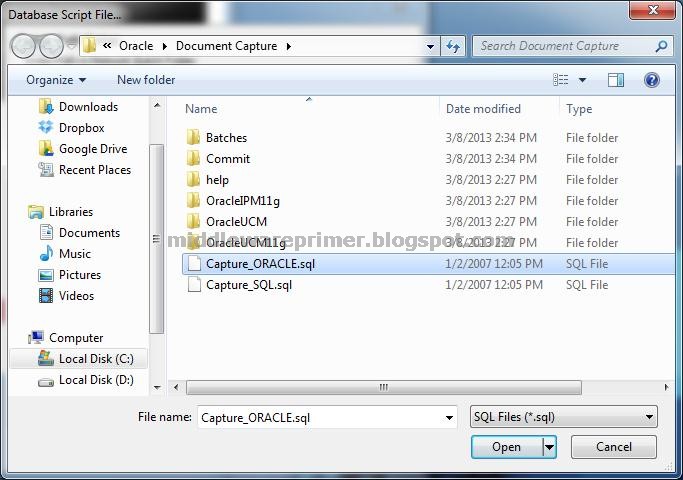
7. You will be prompted to select a database script file. Select Capture_Oracle.sql from the ODC installation directory and click OK.
1.2 Macros
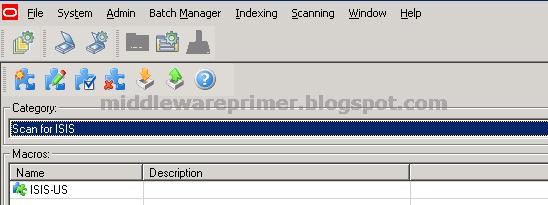
1. Select System Menu and choose Manage Macros option.
2. Select Scan for ISIS as category as shown below
3. Click the Import Icon (Orange Down Arrow) and select OFR-Scan-ISIS-Macro.bas from patch 11813845 extracted directory\ODC Integration
4. In Create New macro Window, Type ISIS-US
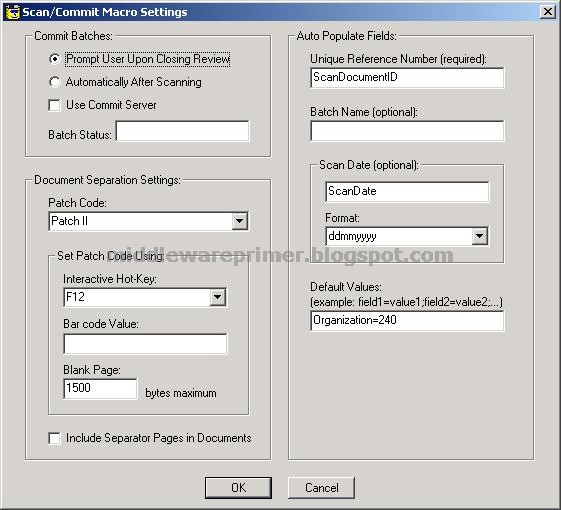
5. Right Click on ISIS-US and choose setup. Setup Screen appears as below and choose the values as show in the screenshot
6. Note Org ID must be 240
1.3 File Cabinet
1. Select Admin Menu and choose File Cabinets option.
2. Enter Name as Invoices-US and click OK
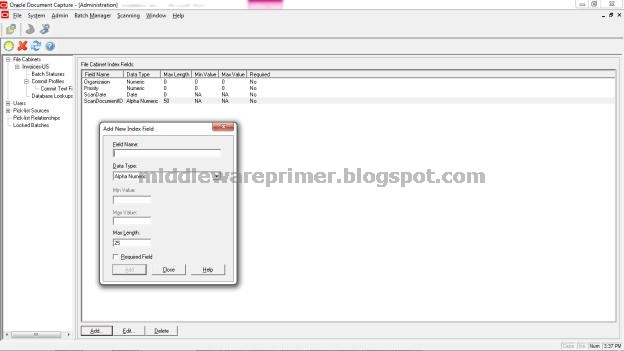
3. Add the Index fields as shown in the below screenshot
1.4 Commit Profile
1. Select Admin Menu and choose File Cabinets option.
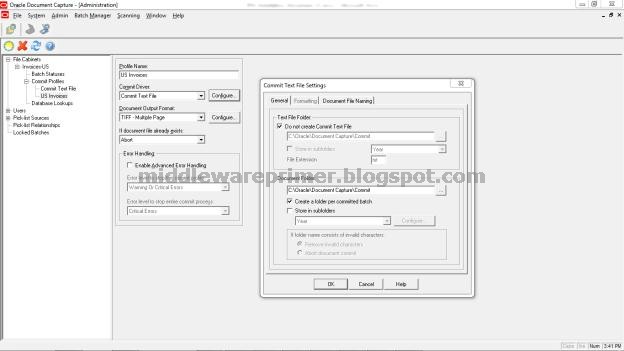
2. Click on Commit Profiles and enter the name as US Invoices Commit as shown in the screenshot below

3. Click on Configure button next to commit driver to open commit text file settings
4. Under General Tab, Add the details as shown in the below screenshot
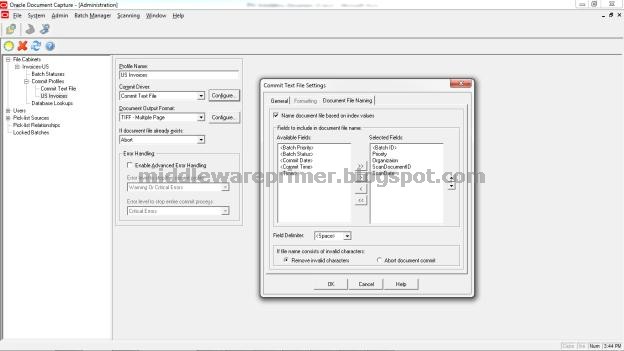
5. Under Document File Naming Tab, add the details as shown in the screenshot below
1.5 Scan Profile
1. Select Scanning Menu and choose Manage Scan Profiles option.
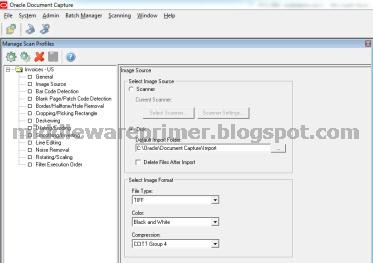
2. Click on the gear icon to create a new scan profile to open the following screenshot. Enter the values as shown in the figure below
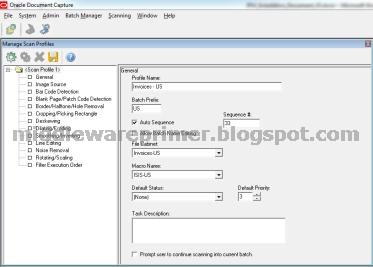
3. Click on the gear icon to create a new scan profile to open the following screenshot. Enter the values as shown in the figure below
The same blog entry is updated here.